Testing services we undertake
We, at Engineering Quality Inspection Services are committed to enhance customer satisfaction strategically by providing reliable, repeatable, responsible and on time inspection.We shall continually endeavor to improve our scope of service and quality while adhering to the minimal wastage policy.
Radiographic Inspection
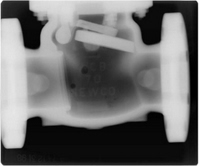
Radiographic test is carried out using the principle of electromagnetic radiation that exposes a light sensitive film when carefully positioned behind the job to be inspected. All flaws within the component can be detected in a 2D view on a radiograph (film). This detection is possible by using either X-rays or Gamma-rays.
PMI
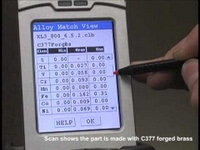
PMI is an outbreak of technology smashing the old-fashioned lab testing. Any material can be inspected of its material grade and composition instantaneously at site with this portable technology, ranging from metals, light elements, mining and oxide minerals. With an advanced Silicon Drift Detector the results are more accurate than a Silicon Pin Detector, not available with most Service Providers.
Ultrasonic Inspection
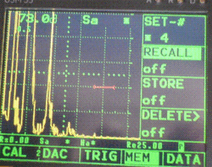
Ultrasonic inspection is carried out to inspect the "soundness" of a material by imparting waves at sonic velocities that reflect from an appropriate flaw within the material and reproducing the same on a screen. The inspection can be done in DAC, DGS or Backwall Loss technique and results can be saved and reproduced as reports.
Magnetic Particle Inspection
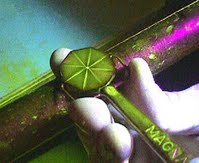
This technique involves spraying or coating a layer of magneto sensitive particles over the surface of the ferrous material that needs to be inspected. Any subsurface or surface defect can be mapped using this technique. This method can detect subsurface cracks up to 5mm.
Ultrasonic Thickness Gauging
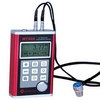
Ultrasonic Thickness Gauging is based on ultrasonic principles to accurately gauge the thickness of any metals by using the pulse echo technique of Ultrasonic Probes with an accuracy of 0.01mm. This method requires access only on one side of the job making it ideal to detect corrosion in tanks and reservoirs. The data can be analyzed periodically to assess the in service life period of the component.
Portable Hardness Testing
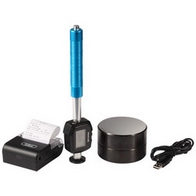
This testing uses a floating indenter that can inspect the hardness at any 360-degree angle. All hardness scales such as HRB, HRC, HV, HB, etc can be digitally calculated and averaged over a scale of trials and instantaneously printed with its attached Bluetooth printer.
Fluroscent Inspection
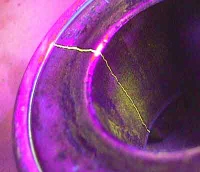
Both Penetrant and Magnetic Particle Inspection can be carried out under black light under a suitable dark environment. Almost all surface and sub-surface defects can be beautiful visualized with a bluish green color that can be easily distinguished because of its improved readability. This can be done on either penetrant or magnetic particle inspection.
Penetrant Inspection
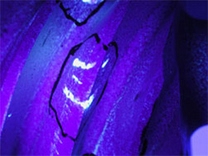
Penetrant testing is a simple age old technique which involves coating a layer of dye based penetrant which disseminates into even the smallest surface discontinuity. The same bleeds out when a suitable solution is sprayed over the surface and draws out the disseminated penetrant by capillary action. This is the most sensitive method of identifying surface defects.
Film Digitization
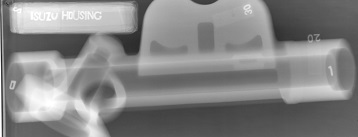
In keeping up with the world of Information Technology,Digitization converts any Radiographic film into a digital format (USB Drive, CDs, or Email).We use a Automatic Digitizer Calibration Technology (ADC)that will deliver of outstanding geometric accuracy, consistency and reliability. The digitizer contains 65,536 shades of grey / black alone (32 Bit Depth) and improves the contrast of even dull radiographs and facilitates to instantly share radiographs to any part of the Globe.
Infra-Red Imaging
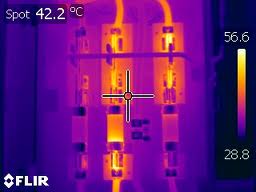
A state of the art FLIR handheld IR camera can be used to detect a host of heat loss related problems. This completely non contact, non intrusive, nondestructive method allows Picture in Picture to overlap a Photographic Camera over the IR Camera to pin point location. Common heat flux leakage such as blown out fuses or water seepage in walls can be pinpointed in a jiffy. With a temperature range of -50 degree celcius to +350 degree celcius the occasions of usage are left to how the user can imagine.
Visual Testing

With a flexible boroscope tube and an attached monitor, visual inspection can be carried out in tight slit holes as low as 9mm in diameter over a range of lengths. The storage is made available in an inbuilt SD card which allows movie recording or still photography on the go.
Tensile / Compression / Bend Test
With a computerized 400kN UTM, along with software and servo motor controlled capabilities, the tests are carried out in a controlled environment. An extensometer allows detection of Proof stress up to 2%. The same applies to compression and bend test as well.
Eddy Current Inspection
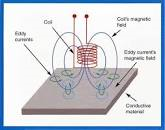
In keeping up with the requirements of the market, Portable Eddy Current Inspection systems, in the same size of ordinary UT machines are capable of performing dual frequency inspections. This allows material sorting, detecting of minute surface flaws by use of "eddies" on the surface.
ASTM Charpy Impact Machine

The ASTM type Charpy impact Machine is capable of performing Impact Test up to 300Joules and Temperatures Subzero in a controlled environment. The machine dual as EN standard machine and also conforms to IS standards of Impact Testing. The multitasking feature of this machine is smart feature not available in most machines.
Optical Emission Spectrometer (Fe, Al, Ni, Cu Bases)
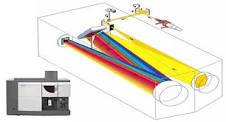
The OES facility allows Chemical testing of Ferrous, Aluminum, Nickel and Copper bases with a good repeatability and accuracy. Separate Standard Reference Material and Certified Reference Materials to cover most matrices are available for inspection.
ASNT LII NDT Training, Certification and Consultancy

We conduct ASNT Level II Courses with experts and Certified ASNT Level IIIs available in house. For more information on the training schedules, course eligibility, course schedules please send on the email address mentioned below.